Pain during sex is NOT normal

I often get asked why I chose to become a pelvic PT. Many people postulate that I have my own pelvic health challenges (I do…but those came later after 2 c-sections). Others assume I’ve always been super into the pelvis. But neither is really the case. The answer is quite a long one… but, honestly, it all came down to the patients.

Sometimes you have a moment in time that ends up defining the trajectory of your life (if you know, you know). And for me, this moment happen during a rotation in Shreveport, LA, while I was working on my Doctor of Physical Therapy degree through Duke University. I had an amazing clinical instructor (Darla Cathcart, who I now teach with through Herman & Wallace), and we were working with a patient who had been experiencing painful sex for as long as she had ever tried to have sex. I remember her talking with us during her initial evaluation, telling us about the relationships that had ended because of this, and tearfully explaining how she wanted this to not be a factor for her current relationship.

Fast forward, several visits later, she came in for her session, sat down, and started crying. She looked up and said, “I had sex, and it didn’t hurt.” I still get goosebumps as I right this. I got goosebumps in that moment. And, it was then and there that I KNEW that I had to help more people like her. I felt such clarity in my path. And I have never looked back.

Painful sex is extremely common. In fact, some studies show that it impacts around 20% of women. Yes, my friend, that is 1 in 5. However, women aren’t the only ones dealing with pain during or after sex. All people can deal with it– regardless of gender or anatomy. And, it really tends to be one of those things that just isn’t talked about. Nearly every time I post about painful sex on social media, I end up with private messages from people who have been dealing with pain for years, and just thought it was normal. Common does not mean normal. A little louder (for the people in the back):

Just because pain during sex is common, does NOT mean it is normal. Not if you:

  • Have had a baby
  • Have never had sex before
  • Have had sex a lot
  • Have been told you are small
  • Think your partner may be large
  • Have had problems with bladder or other infections
  • Have sensitive skin
  • Anything else

While some of these factors may make someone more likely to have pain during sex (like if you had a baby and had a tear that took a while to heal), this still does not mean that pain is just something you have to deal with. Honestly, there are so many reasons why someone might have pain with sex. It could be related to:

  • Decreased lubrication
  • Hormones
  • Inflammation
  • Neural sensitivity
  • Dermatological conditions
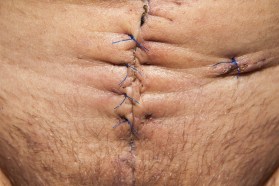
  • Painful scar tissue
  • Orthopedic challenges (especially around the hip or low back)
  • Bowel dysfunction (hello constipation)
  • Conditions like endometriosis/adenomyosis, painful bladder syndrome/IC, or others.
  • Pelvic floor and abdominal muscle challenges

And many, many other things! And so so many different treatments to help! This can include finding the right moisturizers and lubricants for your body, additional medical interventions (medications, hormone creams, and more!) and working with a pelvic health specialist to help you optimize your pelvic floor muscles (through gentle manual therapy techniques, home exercises, lots of education, and a whole lot more!)

If you’ve been dealing with pain during sex, please know that you are not alone.

So so many other people deal with this too. And the great news is that enjoyable sex is possible for you. We can get there. There is treatment available. There are compassionate clinicians who care (if yours didn’t, pllleeeeasssseee go see a new one!). And we can work together to get you feeling better.

I have so much more to say about this!! But for now, I’m going to leave you with a few links for prior blogs with more information!

Vaginal Dilators for Painful Sex

How to Relax Your Pelvic Floor Muscles

Sex After Baby

Are you ready to get started?

We are offering 20% off through September 30th on our 90-min mini classes: Overcoming Painful Sex and Self-Treatment for Pelvic Floor Tension using the code, ENJOY20. These classes are full of awesome information, exercises, and resources for getting started!!

All my best,

Jessica

How to relax your pelvic floor muscles

balance macro ocean pebbles

Whenever I teach coursework to pelvic PTs, a common theme tends to come up. While teaching someone to contract their pelvic floor muscles can be challenging, teaching someone to relax and lengthen? So much harder! And teaching someone to actually bear down (the way you need to move your muscles to have a bowel movement)? Way way harder! So, I wanted to take some time today to talk about how to relax and lengthen your pelvic floor muscles. This is super helpful for anyone experiencing pelvic floor overactivity– which often includes people with pelvic pain conditions, constipation, painful sex, and urinary urgency/frequency. And if you’re a rehab professional, this post will also give you tips to help train your patients to lengthen.

As an aside, if you’re a rehab professional and new to pelvic floor therapy, check out my facebook group, built just for you: Pelvic PT Newbies! This group was born after teaching so many new clinicians who just lack the support they need to grow into the incredible practitioners they can be! So, come join us! And, if you’re a more seasoned clinician who loves supporting newbies, you are welcome as well!

Back to the topic at hand, how do you learn to relax and lengthen your pelvic floor muscles? Let’s get started!

1. Locate and find your pelvic floor muscles

It’s tough to let go of tension in a part of your body you don’t really know. So, step one is locating these awesome muscles. The pelvic floor muscles are inside your pelvis like a hammock and run from your tailbone to your pubic bone. They support your organs, stabilize your pelvis and spine, control your sphincters, allow for sexual appreciation, and act as a sump pump to pump blood and lymphatic fluid in and out of your pelvis (Yep, those are the 5 S’s we teach at H&W). They are also super important for breathing–coordinating with your respiratory diaphragm, and play a big role in postural stability and movement. So, locate those muscles in your mind, and see what you know. Can you use those muscles and contract as if you were holding back gas or cutting off a urine stream? If you aren’t sure you’re doing it, grab a mirror, and take a look at your perineum. Do you see the anus pull in (like it’s winking) away from you and the perineal body (between the vulva/penis/scrotum and the anus) lift in? Or do you see the anus bulge out? If you have a vulva, you will also see a small amount of lift there and you will see the clitoris do a really tiny little nod of approval (that’s because the pelvic floor muscles superficially attach to the hood over the clitoris). If you have a penis, you’ll see the penis move as you contract.

Print

Once you connect with your pelvic floor muscles, the opening and lengthening can begin.

2. Pelvic Floor “Drops” with Diaphragmatic Breathing

This is my standby, go-to, exercise for encouraging lengthening and opening of the pelvic floor muscles. To perform this exercise, bring your mind back to your pelvic floor muscles. Then, aim to let go of the muscles and lengthen, as if you are starting a urine stream. Note– this does NOT mean bear down and push out. Urination actually should not require ANY pushing. This is simply opening, letting go, and lengthening. Another tip to help visualize this is to think about a straw in one of your orifices, then imagine that straw is in a cup of water, and you’re trying to gently blow bubbles in the water (believe me, I’m full of weird visual analogies!) After you drop and lengthen your muscles, let’s do slow, diaphragmatic breathing. Breathing well means allowing your chest, ribcage, and belly to expand as you inhale– Yes, this is NOT just belly breathing! Belly breathing really does not harness the diaphragm the same way! So, perform slow breathing inhaling, allowing your ribs to open, chest to lift, belly to expand AND pelvic floor muscles to open, then exhale gently. Repeat this slow breathing for 2-3 breaths. Then, check in with your pelvic floor muscles, drop them again, and repeat! If it is challenging to know if your muscles are opening or not, you can perform a very small (like 10-20%) activation of the pelvic floor muscles before letting them lengthen and open. That being said, if you have significant overactivity, even a small contraction can irritate the muscles– so pay attention to what you feel!

3. The Elevator Let-Go 

This is another visualization that can sometimes help you leg go all of the way of your pelvic floor muscles. To do this, visualize an elevator sitting in your pelvis. This is your main floor, and your building has 10 floors, and a basement. Now, use your muscles to gently lift that elevator to the first floor. Then, drop the elevator to the main floor. Take a deep breath while you visualize the elevator dropping all the way to the basement. Keep the elevator there while you gently take 2-3 breaths. NOTE: This also should not require much effort– we’re aiming to gently relax and lengthen. 

4. Happy Baby Breathing 

This is one of my favorite positions to encourage lengthening of the pelvic floor muscles. For this exercise, you’ll lie on your back and bring your knees up toward your chest, then open your knees and reach through to grab your ankles or your toes (whatever is comfortable and allows you to relax). In this position, take deep long breaths, focusing your breath into your abdomen and pelvis.

Hopefully this helps you get started! Believe me, lengthening the pelvic floor muscles can be challenging, so try not to get too frustrated if you find this difficult at first! If you’re struggling, reach out to a pelvic PT. We’re happy to help you figure this out, and have more tools available if these ones don’t resonate with you!

~ Jessica

5 Exercises to Move Better During Pregnancy

Yesterday afternoon, I met my team of pelvic PTs at at the office for some photo and video time. Our model? Dr. Kellie, who is about to have her last week with us in the clinic before leaving on maternity leave for her second daughter. You see, working at a pelvic PT practice, we have to take advantage of one of our own being pregnant! How could we miss an opportunity to record videos and take pictures to expand our library! 🙂

Movement during pregnancy is incredibly useful. First, it can help with many of the aches and pains that commonly develop. It helps to keep your muscles active, and ultimately, can help prepare you for the process of labor and birth. We wrote a while back on healthy exercise during pregnancy, so start there if you want to know where you should get started for movement.

Today, I wanted to focus on movement to help you feel better. These exercises promote gentle movement around your spine and pelvis and activation of the muscles around your deep core.

Cat-Cow

Goal: Improve mobility around your spine and pelvis. Coordinate movement with breathing.

  1. Inhale slowly, and as you do, gently let your tailbone out, and lift your head

Try not to allow your back to dip super far down but stay within a comfortable range.

2. Exhale and gently tuck your head, lifting your belly up and rounding your spine, allowing your tailbone to tuck.

3. Repeat this flowing gently with your breath as you inhale and exhale

Aim to do this 10-15 times in a row, alternating with the modified child’s pose that is described below.

Modified Child’s Pose

Goal: Lengthen lower back, gluteal muscles, pelvic floor, and inner thighs. Encourages relaxation and opening around the pelvis.

This exercise works really nice to alternate between sets of the Cat-Cow.

  1. First, place pillows in front of you, leaving a gap for your belly. You can use 1-3 pillows, depending on your belly size.
  2. Sit back on your heels, and open your knees to a comfortable width.
  3. Lean over the pillow, allowing your body to relax and reaching your arms forward. Let your head rest to one side or the other.
  4. Relax in this position for 1-2 minutes.

Ball Pelvic Mobility

Goal: Improve the movement around your pelvis and spine

  1. Sit comfortably on an exercise ball with your feet supported on the floor
  2. Inhale, letting your pelvis out, allowing a small arch in your back
  3. Exhale, tucking your pelvis under gently pulling your belly in.
  4. Repeat this to warm-up x 10
  5. Then, add a rotation, inhaling and rotating clockwise with your pelvis until you reach the arched back position. Then exhale, continuing to rotate clockwise until you reach the tucked position.
  6. Repeat this x 5-10 repetitions, then switch to counter-clockwise.

Bird-Dog Progression

Goal: Activate your deep abdominals and pelvic floor muscles paired with your breath.

  1. Begin in a hands and knees position with your spine in a neutral position (not flexed or arched)
  2. Inhale to prepare, exhale and gently engage your pelvic floor muscles while gently drawing in your belly. Aim for a slight contraction (not hard!).
  3. While you do this, extend one arm in front of you.
  4. Exhale, lowering your arm and relaxing your muscles.
  5. Repeat, alternating lifting with your opposite arm. Be sure to keep your spine in a comfortable position while you are doing this exercise. Repeat this movement for 10-15 repetitions.
  6. To progress this exercise, you can also perform with an alternating leg movement, aiming to keep your spine in a neutral position.

Wall Squats

Goal: Coordinate movement with breath, activate pelvic floor with gluteal muscles

  1. Place a ball behind your back and lean against a wall. Keep your feet placed out in front of you, flat on the floor.
  2. Inhale while you bend your knees and lower.
  3. Exhale, engage your pelvic floor muscles slightly, and lift up to standing.
  4. Repeat this exercise for 10-15 repetitions, performing 2-3 sets.

Note: While doing this, keep your feet far enough in front of you that your knees don’t cross your feet.

I hope you’ve enjoyed these exercises! What exercises do you like to do to move well during pregnancy? Any favorites we need to add?

Look for more coming from us on all of this in the future!

Diastasis Rectus Abdominis (Part 2): How can you help it?

2 weeks ago, we chatted about what exactly is a diastasis rectus abdominus (DRA) and how to check to see if you have one. Today, we’re going to talk about how pelvic floor physical therapists evaluate a person with DRA, and what can be done to improve this. If you are struggling with support at your belly, I also hope you will join us for our upcoming LIVE class focused on this exact topic! Sara Reardon and I invited Sarah Duvall, an incredible expert, to join us for a 90-minute class on Diastasis Recti Rehabilitation. We took a lot of time to plan out this content, and I have to tell you all– this class is going to rock! The LIVE event is coming up Sunday May 3rd at 3pm EST, and it will be available after as a recording. We have a lot of great bonuses also– including handouts on exercises to get started and a lot more! Registration for the LIVE class is limited, so don’t wait to sign-up!

As we discussed previously, DRA involves an increased gap between the two bellies of the rectus abdominis muscle and a loss of support at the abdomen. Often times, people experiencing this will feel like they don’t have as much control or stability at their belly, and they may feel a bulging at their belly (some will even feel like they look pregnant when they aren’t!) We also discussed how to check to see if you do have a DRA. Now, let’s talk about how we approach making this better.

Your first visit 

When we first evaluate someone with a DRA, we always make sure we get a complete history of the problems and challenges they are experiencing. This includes discussing any pregnancies/births (if applicable), their pelvic health (yep– bladder, bowel and sexual function), musculoskeletal challenges, medical problems, and their fitness preferences and routines. Then, we discuss their diastasis and what is bothersome to them. Is it primarily the appearance or the knowledge that it is there? Are they also struggling with back pain or pelvic organ prolapse or other problems? Does their diastasis limit their ability to exercise or lift their children? Our goal here is to really have a complete picture on the challenges they are facing.

The exam

Next, we move into an examination. This can include many different parts. As a diastasis is a pressure system problem, we want to look at everything that could impact the system. This could include:

  • Movement patterns
  • Spinal mobility
  • Preferred postures/positions
  • Ribcage movement
  • Breathing patterns
  • Pelvic floor function (yep, sometimes people with DRA benefit significantly from a specific pelvic floor exam if they’re on board with it!)
  • Scar tissue mobility
  • Myofascial mobility at the abdomen and the back
  • Abdominal, hip, and pelvic motor control/strength

Each of these components can actually influence how much pressure is at the linea alba (between the two bellies of the rectus abdominis) and the control at the abdomen. If someone has decreased movement around their spine and ribcage, this can impact the fascia around the abdomen and contribute to widening at their midline. If they have less optimal breathing patterns, this could be funneling pressure where we don’t want it to go, instead of spreading the pressure out across the trunk and sharing the load.

Once we do a comprehensive evaluation, we develop a treatment plan to address the problems we found. This typically includes:

  • Improving global movement patterns
  • Improving breathing patterns (both in static postures and during movements/activities)
  • Restoring mobility and improving sensitivity at muscles and soft tissues (including scars)
  • Optimizing the pressure system
  • Retraining the abdominal wall

I want to talk a little bit more about how we can optimize the pressure system and retrain the abdominal wall.

Optimizing the pressure system

When improving DRA, it’s very important to keep the pressure system in mind. Pressure at the abdomen and pelvis depends on coordination of several muscles that work together in synergy. This includes the glottis, intercostal muscles, respiratory diaphragm, transverse abdominis, lumbar multifidis and the pelvic floor muscles. Mary Massery (who has contributed SO much to our understanding of these pieces) created an analogy of a soda pop can.

can-307312_1280

In this analogy, the glottal folds are at the top, the pelvic floor muscles at the bottom, and the respiratory diaphragm in the middle. The intercostals, lumbar multifidus, and transverse abdominis are around the can. So, basically, these structures together work together to keep pressure spread out, leading to a strong and functional core. In the soda pop can example, the thin aluminum is pressurized on all sides, leading to a strong can that is difficult to break (Of course, this changes if the can is open or has a hole in it!)

So, in the case of a diastasis rectus, the pressure system is often not working optimally. Basically, pressure in many cases is funneled toward the belly, instead of being spread to all the structures, and this can contribute to gapping, bulging and a loss of support.

So, from a treatment standpoint, our goal becomes to optimize this system. We get to play detective and find out which of these structures are working well, and which need some assistance to do their job optimally. Then, we retrain this system, focusing on the natural synergy that should be present. When this is done well, we help the body learn to spread the load, decrease the funneling of pressure to the belly (or elsewhere) and thus, we improve what the person is experiencing at their abdomen.

Retraining the abdominal wall

After we improve the pressure system, we need to retrain all of the muscles in the abdominal wall. This further helps to improve the pressure system, but it also can assist in stimulating the fascia in the abdomen. Often times, retraining the abdomen starts by building the pressure system base like we discussed up above. This base– the pelvic floor- diaphragm- transverse abdominis- lumbar multifidus- base– is the key to what else we need to do to improve function at the abdomen. The transverse abdominis is particularly important. This muscle helps to tension the linea alba, which improves force transfer through this structure.

Next, we use breathing and awareness of muscles to retrain these muscles in a variety of movements, postures, and exercises. This can start as a simple progression– learning to activate these muscles while breathing and lifting an arm, then lifting a leg– and progressing from there.

We also teach self-awareness of the abdomen. So, this helps you identify how you manage pressure in your abdomen, and this is very important in making sure you are challenging your system, while still being able to control pressure (and not allow the pressure to funnel in your belly and produce coning and doming). As we progress in exercises, we ultimately want to retrain this system within the rest of the muscles in the abdomen, and this is fun, because we can be very creative and often help people progress toward things they did not think would be possible for them. So, can someone struggling with a diastasis eventually do planks? sit-ups? Abdominal crunches? What about pilates? Yoga? Barre classes? Most of the time, we can work together to help you reach the goals you want to reach. I really believe there are not “bad” exercises, but the key thing is determining the readiness of the person to do the exercise well, and ensuring that they can modulate pressure while doing the movement.

So, if you’re struggling with your belly…

Know, that there is hope. There is so much we can do to help restore stability at the abdomen and improve the way you move and transfer force through your belly. Come and join our upcoming class (or get the on-demand recording if you’re reading this later!) If you’re struggling, there can really be so much value to being evaluated by a pelvic health provider in person. So reach out! And if you need help finding a pelvic PT, check out this prior blog post to help you!

As always, reach out if you have questions!

~ Jessica

Diastasis Rectus Abdominis (Part 1): What is it? Do you have it?

If you’ve been pregnant before, you know the feeling of going out and having everyone comment on your beautiful belly. Of course, we all get the occasional, “wow, are you sure you’re not having twins?” “When are you due? You’re not going to make it there!” (And can we collectively just tell those people to leave us alone!!) BUT, the majority of the comments are, “you look amazing!” “Wow, she is really growing!” “How are you feeling? Congratulations on your baby!” Honestly, my own body self confidence was at a high during pregnancy.  But then, our sweet little love muffins are born. And society expects us to very quickly bounce back to our pre-baby state (and I have so many thoughts on that…because we just went through this transformative, incredible experience, that took nearly 10 months to build! And often times mamas are left alone to figure things out after birth).

As an aside, this was one of the BIG reasons that my friend and colleague, Sara Reardon, and I decided to partner together to create live & on-demand classes! We recognized that soooo many people are struggling with pelvic health problems. While individualized pelvic PT is so beneficial, it’s not always possible for people at the time they need it. For one…ummm…coronavirus/social distancing. But also, some people prefer trying to learn and work independently, may feel too nervous to discuss their problems with a provider, or may have a schedule/time constraints/financial constraints/geographical constraints that just don’t allow individualized care at the time they are wanting it. SO, these are our classes. We have 2 LIVE postpartum classes coming up– TOMORROW 4/14 is our “Postpartum Recovery After a Vaginal Birth” Class, and the following Wednesday 4/22 is our “Postpartum Recovery After a Cesarean Birth” Class (SO excited about this one as a mama of 2 Cesarean babies!). These classes are built for the consumer—BUT, if you are a health care provider, I can guarantee that you’ll learn a bunch also! We sold out before the start of our “Pelvic Floor Prep for Birth” class, so if you’re on the fence, register soon and reserve your spot!

Anyways…back to our topic at hand: Diastasis Rectus Abdominis.

The abdominal wall is stretched during pregnancy to accommodate the sweet growing munchkin, and in some cases (most cases, according to some research!), this leads to a stretching at a structure called the linea alba- the connection between the two sides of the rectus abdominis or “6-pack” muscle group. When this becomes larger than about 2 fingers in width, it is known as diastasis rectus abdominis (DRA). This is what it looks like:

Ultrasonography_of_diastasis_recti
Mikael Häggström, M.D. – CC0, obtained via Wikimedia Commons

The two “+” marks indicate each side of the lines alba, and you can see that it is wider than it likely was previously. Note, this is an ultrasound image of a 38 year old mom who had diastasis after her pregnancy. DRA is different than a hernia. When a hernia occurs, there is a defect that allows an organ or tissue to protrude through the muscle/tissue that normally contains it. So, someone could have a DRA and not a hernia. Or, they could have a DRA and a hernia. Make sense?

Diastasis rectus abdominis is common during and after pregnancy, and varies in severity. For some moms, they may not really realize it’s even there. Others may feel a complete lack of support at their belly, notice a bulge, or even worry that they still look pregnant.  A recent study published in 2016 found that among 300 women who were pregnant and gave birth, 33.1% had a DRA at 21 weeks gestation. At 6 weeks postpartum, 60.0% had a DRA. This decreased to 45.4% at 6 months postpartum and 32.6% at 12 months postpartum. So, basically, many pregnant folk get this, and while for some it gradually improves over time, for others it can persist.

The link between DRA and musculoskeletal dysfunction is not confirmed. A recent systematic review published in 2019 found “weak evidence that DRAM presence may be associated with pelvic organ prolapse, and DRAM severity with impaired health-related quality of life, impaired abdominal muscle strength and low back pain severity.” This makes a lot of sense to me. Conditions like pelvic organ prolapse and low back pain are complicated, but in some cases do have components related to pressure management. The abdominal wall is very crucial in helping to modulate intraabdominal pressure, so it makes sense that when it is not functioning optimally, a person could struggle with managing pressure well.

The intra-abdominal pressure system involves coordination between the respiratory diaphragm, low back muscles, transverse abdominis, and pelvic floor muscles. These muscles need to work together to control pressures through to abdomen and pelvis and create dynamic postural stability. When the abdominal wall has a loss of support, this system can be impacted and contribute to pressure problems like prolapse and low back pain. However, those diagnoses are complicated. There are many other factors involved (like connective tissue support, amongst other things), so this is why a comprehensive examination is often very beneficial. This is also why not everyone who has DRA has pain.

I think it’s important to note here, that for some people, their DRA may not be contributing to things like back pain or prolapse, but it may still be a huge problem for them. People can feel guilty about caring about the cosmetic component involved in some instances of DRA…you know…the pooch. But, you know what– if this matters to you, then it matters! Feeling confident and strong is so important! So, don’t let anyone tell you what is or isn’t important for you to care about!

So, how do you find out if you have a diastasis?

The best thing to do if this is sounding like you is to see a pelvic PT to be evaluated comprehensively. There are many different things that can contribute to a loss of support at the abdomen, so looking at the complete picture is the best option. We’re going to talk about some of those pieces and how we as pelvic PTs evaluate DRA in Part 2 of this blog series. However, there are ways you can examine yourself and find out if you have a diastasis rectus. First, lie down on your back with your knees bent.

IMG_9612
In this image, my two fingers are at my belly button, and my other hand is over the top, reinforcing what I feel.


Start by placing two of your fingers at your belly button. Next, lift your head and your shoulders up (like doing an abdominal crunch) and sink your fingers in, gently moving them back and forth to feel the sides of your rectus abdominis. Notice if your fingers sink in, and if you feel a gap between your muscles. Repeat this a few inches above your belly button, and again a few inches below your belly button. Also notice how you feel as you do this– do you feel tension at your fingers? Do your muscles feel strong? When you lift up, are your fingers pushed out or do they sink in? What do you notice? (This is great information for you to understand how much force you can generate through your “gap” and will be important as we start discussing how we treat this!)

How can you help a diastasis?

Well, the good news is that there is so much we can do to help improve diastasis, make your belly stronger, and help you feel better.  In part two of this series, we’ll discuss the ways pelvic PTs can best evaluate someone who has a diastasis, and the methodology we use to treat this problem. The method of treating this has changed over time, so I’m going to give you my best understanding of the research as it’s available today! Stay tuned to learn more!

Stay healthy during this time my friends– and wash your hands!

~ Jessica


Virtual Care & Pelvic Yoga at Home

If you would have told me two weeks ago that I would have closed the doors to my clinic, Southern Pelvic Health, a week later, and shifted my practice to a virtual one, I would not have believed you. Maybe I was naive (yes, I probably was), but this change came quick to me. It almost happened overnight. And, here we are. I am moving into my second week of working with my patients online. While for many, that seems incredibly scary, I actually think that shifting to an online platform for a while is going to do a lot of good.

Last week, I worked with a few other colleagues to host a webinar on bringing pelvic health online– basically, how do pelvic floor PTs treat most effectively without actually touching their patients? It was a quick production–one built out of necessity–and it sold out in 24 hours because rehab professionals everywhere are trying to figure out how we can still be there for our patients and help them get better during this time. (For my colleagues out there, if you missed it, it’s still available as an on-demand purchase!) I brought together 5 experts from various corners of the country and the world, and we spoke for nearly 2 hours about how we assess the pelvic floor, evaluate patients, and actually help patients get better in a virtual setting. It was full of creative ideas, and also challenged some of the current practice patterns. As you know, I work hard to always question my own practice–learn more–do better– and I’m excited to see what this next period of time does for me as I learn to better and more effectively treat my patients, to be creative with self-care treatments and home strategies, and to use movement to help patients move when my hands are unable to. I will share what I learn with you here, of course.

Pelvic PTs are not the only professionals taking their skills online! Last week, my daughter and I joined a “Frozen Sing-A-long” through a local princess parties company. I have been thrilled to see some incredible resources for people with pelvic floor dysfunction hop online, and I am excited to share some of those with you today!

So, what can you join virtually this week? 

Yoga for Pelvic Health

My dear friend and colleague, Patty Schmidt with PLS Yoga, is incredible and specializes in therapeutic yoga for pelvic floor dysfunction. She is bringing several awesome classes online! AND, they are cheap– $15 per class (which honestly, is a HUGE value for the expertise she brings!) So, I do hope you’ll join in:

Patty also is teaching private sessions virtually at $30 for a 30-minute session. This is a steal, believe me!

I also need to share with you all of the FREE yoga resources through another friend and colleague, Shelly Prosko. Shelly has this incredible library of Yoga options for pelvic health, all available right here.

I hope you are able to partake of these awesome resources. Remember, we are in this together my friends! I’ll leave you with a quote from a much-loved movie in my house, Frozen II, “When one can see no future, all one can do is the next right thing.” Let’s all try to do the next right thing amidst this craziness!

Much love,

Jessica

PS- If you are struggling with pelvic floor problems at home, we’d love to help!! Schedule a virtual session or a complimentary phone consultation with us at SPH!

Back Pain and Breastfeeding? Here are 5 Tips to Help!

Did you know that last week was international breastfeeding week? I know this event and really, even discussions about breastfeeding can lead to lots of thoughts amongst mamas. Pride, having accomplished something challenging. Sadness, if your breastfeeding journey did not necessarily go as planned. Fear, as to whether your baby is actually getting enough milk and growing the way she should. Joy. Guilt. Happiness. Anger. The list goes on.

I think it’s important that while we recognize that breastfeeding has incredible benefits, we also recognize what is most important– a fed and growing baby and a healthy happy momma. There is so much that goes into the decision a parent makes about how to feed their baby, and it’s important that we help all feel supported and loved– not judged and put down. (Again, let’s build each other up, parents!!)

Musculoskeletal pain postpartum is fairly common. A 2019 study of 400 breastfeeding women found that around 37% experienced neck pain and 22% experienced low back pain. Another 2015 study looked at the experiences of 229 individuals after giving birth. Around 50% experienced back pain and 25% had an onset of back pain at 2 or more weeks postpartum. (This later onset makes a lot of sense to me based on the big changes in movement and positioning that often happen after having babies.)

So, if you are having back pain after childbirth, you’re in good company. I’ll add here that while this is indeed common, it if not normal. This is good news, because it means that we actually have strategies to help this improve.

What can a nursing mama do to help these aches and pains?

1. Be sure you are using good mechanics when you feed your little one. My daughter takes 20-30 min to feed and ate every 2-3 hours after birth (and now, at 9 weeks old, still eats every 2 hours or so during the day–but sleeps more at night!! Yay!). That means that she feeds anywhere from 160-360 minutes each day. That is a long time to be in the same position. So, to minimize aches and pains, aim to sit with support at your back. If possible, find a comfortable place to feed your baby where your body can relax and you aren’t having to work to stay in a good position for feeding. Also, be sure you bring your baby to your breast not your breast to your baby. If you are having to bring your breast to your baby, you’ll inevitably slump down and holding that position for 20-30 minutes makes my back hurt just thinking about it.

IMG_2443
My first little nursling, Emma, after she just finished eating.

These recommendations also hold true for my pumping and bottle feeding mamas. Pumping also leaves you in one position (unless you have one of the new styles of pumps like the Elvie– more to come later on that!!) for a long period of time, so being sure you have a comfortable place to pump and feed your baby is key!

2. Use pillows and cushions to provide support. Remember, 360 minutes in one position each day can be touch. Try using pillows like the boppy, brest friend, or others that support the baby being lifted to the breast. I actually find for my daughter that I like the boppy more when I sit in my glider or recliner, but I prefer the brest friend when I’m sitting in bed (used with a pillow under it for positioning). Right after birth, depending on where I was sitting, I sometimes just preferred using a few pillows, or using a football hold position to nurse. So, try a few options and see what helps you get into the most optimal position.

If you are bottle feeding, using pillows and supports like this can still be helpful to keep you in an ergonomic position and support your baby during your feed.

3. Change it up. When it comes to posture, the current thought is along the lines that there is not one perfect posture per se, but rather variability in posture and movement seems to be important. So, changing up your position to feed can sometimes help. This can mean feeding in a wrap or a carrier (I have yet to master that!), or nursing while lying down (my most favorite!). Sometimes mixing it up like this can make a big difference.

4. Take movement breaks between feeds. This goes along with Tip #3. Movement breaks like this feel amazing to me after nursing my little Mary. The following movement sequence is meant to take you out of the position you’re in to feed, and help restore some variability. Doing a short movement series between feeds like this can really help improve these aches and pains.

Cat-cow: I love this exercise because it allows your spine to move well into flexion and extension. This can feel great when you have been feeding for so long or holding your baby in a slightly flexed position. Pairing this with breathing can be fantastic as well (and helps to get your deep core–including your pelvic floor–involved). To do this, inhale while your back extends and your head comes up. Exhale while you arch your back, tucking your pelvis and allowing your head to drop down.

Wall Angels: This is another of my favorites. This exercise stabilizes your low back while encouraging movement at your shoulders and mid-back. It feels AMAZING if you have been sitting for a while at a computer…or in this case…sitting for a while and feeding a little one!

Reach and Roll: This exercise is a good one to get some movement in your shoulders and thoracic spine. Keep your pelvis “stacked” and your knees and hips bent to 90 degrees to encourage movement through your upper back.

Child’s Pose: This is a nice position to open your hips, lengthen your spine and extend your shoulders. As a bonus, a wide-kneed child’s pose also encourages lengthening of the pelvic floor muscles, so this is a favorite exercise of mine for individuals with pelvic floor overactivity or pelvic pain. **If you are fairly early postpartum, you may not want to lengthen your pelvic floor this way. So, in your case, consider keeping your knees together rather than wide.

5. If pain persists, seek help! This could mean seeing a lactation consultant if you are needing help positioning your baby. It could also mean seeking an evaluation with a physical therapist who has experience working with people postpartum (usually, this primarily includes pelvic health PTs). While back pain can be very aggravating, it is often very treatable. We usually see good results for people experiencing this, very quickly.

I hope this helps some of my fellow nursing mamas! If you have any questions or comments, feel free to reach out!

Have a wonderful weekend!

~ Jessica

Early Recovery After Caesarean Birth

6 weeks ago, we welcomed our second daughter into the world. Mary Lynn was 6 lbs 10 oz of squishy, adorable, babyness. And she came into the world via a Caesarean birth. And it was amazing. And hard. But good.

59c3a571-85e4-477b-b7f0-ede0ec62134d
In the recovery room right after Mary’s birth!

C-sections come with challenges, just like vaginal births do, and for me, these challenges included a significant blood loss that led to me fainting on the second day, a super low blood pressure due to a response to the epidural that contributed to the fainting but also meant going off of my epidural pain meds really early, and nerve pain that lasted for about a month after Mary was born. (We’ll y’all more about that another time.)

Since I am living the early postpartum life, I thought it would be fun to do a series of posts on my own rehabilitation journey (since, in many ways, each of my births has been a mini-case study for myself!).

So, let’s talk Cesarean rehab in the first 6 weeks!

Moving well after major abdominal surgery

I love when people imply that birthing via Cesarean section is somehow “the easy way out” compared to birthing via the vagina. Hello people, this is major abdominal surgery! All mommas get birthing badges– let’s support each other in our journeys, right?!

Initially after a Cesarean, movement alone can be challenging. Standing up from a chair. Rolling over in bed. Lying down in bed. But the good news is that with some easy tips, this movement can become much easier. First, as you are moving, bending, standing, etc. remember to “blow before you go.” This easy to remember phrase comes from my friend and colleague, Julie Wiebe. This means, begin to exhale before you initiate a movement. Breathing like this with movement helps to control pressures within the abdomen and pelvis, so it can significantly help you in your movement after having your baby- both in terms of ease but also in protecting your pelvis and abdomen.

When standing up from a chair, remember, nose over toes. Scoot to the edge of the chair first. As you go to stand, lean forward first. This puts your body weight over your legs and helps take the burden away from your core.

When you lie down or get up from lying down, channel your inner log. So, when you lie down, first sit on the edge of the bed. Slowly lift your legs onto the bed, then lower the rest of the body down, using your arms for support. If you need to roll over, bend your knees, then roll your body as a unit- like a log. Reverse these steps for getting up out of bed.

Abdominal Binders and Compression Underwear? It depends. It may be worth considering  using an abdominal binder for the first few weeks after your birth, progressing to wearing compression underwear or shorts(ie Spanx, SRS recovery shorts, Core shorts). These types of garments provide support to the abdomen and can be incredibly helpful for moving and walking around after your surgery. The flip side with compressing the abdomen is that it can impact how well you can move your ribcage and can influence pressure mechanics within the pelvis. So, if you are already struggling with pelvic organ prolapse or urinary leakage, or if you pushed for a period of time before having a Caesarean birth, it may be worth talking with a pelvic floor PT prior to utilizing this during your recovery. Generally, the compression underwear/shorts provide more support to the pelvic floor and abdomen, so they may be a little better with pressure modulation than the binder. For me personally, the binder and compression undies were amazing! They took away my nerve pain, and helped me move much better. I chose to wear these sporadically during the day (a bit on, a bit off), and practiced breathing well with my diaphragm during the times the binder was off.

Handling your incision

Initially, your main focus here is keeping your incision clean, and monitoring it to make sure it is healing well with no signs of infection. Around 6 weeks, if you are cleared by your physician, you can begin to gently mobilize the tissue around the scar and aim to desensitize the scar. I usually start above and below the scar, before working on the scar itself. You can perform gentle massage to the tissue above and below the scar and gently stretch the skin in all directions above and below the scar. You can also gently desensitize the scar by touching it with your fingers or a wet cloth, and gently rubbing across the scar in all directions. We can mobilize this scar tissue further, but we are going to talk about this in a future post as this post is focusing on the early period of healing.

At this time, you can also begin applying silicone gel or silicone strips to help soften your scar and prevent hypertrophic or keloid scars. Silicone is considered a gold-standard treatment for the prevention or treatment of hypertrophic scars. While most of the research regarding silicone is of poor quality with significant bias, evidence does tend to suggest a positive benefit. My first Caesarean did lead to a hypertrophic scar, so I began applying silicone gel to my scar once cleared by my OB to do so, around 4 weeks after Mary’s birth. I’ll report back on the difference between this new scar and the old one (See, mini case study!).

**I also have to note here that my colleague, Kathe Wallace, has a fantastic book that details some recommendations for scar tissue management after Caesarean. Kathe also offers a free abdominal scar massage guide at her website, which is a fantastic resource!

Exercise in the Early Postpartum Period

If I could give you one piece of advice on this early postpartum period, it would be to relax. Give yourself a break. Allow yourself to recover and heal. I find that so many people want to jump into too much, way too soon, and unfortunately, this can be more harmful than it is helpful. Remember, you just did something incredible. You just had major surgery. You deserve to rest. 

When we think about exercise during this initial period of healing, we are going to start very gently. Here are a few things you can get started on:

  • Walking: I’m not talking about going and walking several miles. During the first few weeks, it’s best to really rest, and give your body time to heal. Getting up, walking around the house as you feel comfortable can be very beneficial.  As you continue to heal, during the next few weeks, you can increase your walking. So, this may include some outings and short periods of walking between 2-4 weeks. Between 4-6 weeks, you can generally consider a leisurely walk in your neighborhood or a longer outing. The key here is to listen to your body. Rest when you need to, but gradually move to increase your endurance. After you see your OB for a postpartum visit around 4-6 weeks, and you are cleaned to do so, you can continue to gradually increase your walking as you are feeling comfortable.  Are you antsy to jump back into running? Zumba? Bootcamp? Pilates? Don’t. We’ll get there. But let’s rest right now.
  • Breathing: You all know I am fairly obsessed with the diaphragm. 4 years after this post was written, I still think it’s one of the coolest muscles in the body. The diaphragm works in coordination with the pelvic floor muscles, deep abdominal muscles and deep low back muscles to provide support to the abdominal organs, modulate pressure in the thorax and pelvis, and provide dynamic stability to our spine and pelvis. Slow breathing, aiming to expand your ribcage and relax your abdomen as you inhale, then slowly exhaling your air can be incredibly beneficial to re-establishing these normal functional relationships.
  • Gentle Pelvic Floor Muscle Activation & Relaxation: First, my biggest recommendation would be to SEE A PELVIC PT before and during your pregnancy so you really know your current function and can have an individualized plan to get the most out of your muscles and your body. I encourage people to discuss their delivery with their OB, and ask about beginning gentle pelvic floor and abdominal exercises. The timeline for starting this will depend on the specifics of your delivery, and we want to be smart when activating muscles that have been cut. When your provider is on-board with you starting, I like to pair gentle pelvic floor and abdominal wall activation with breathing. This looks like this:
    • Inhale, expanding your ribcage, relaxing your abdomen and your pelvic floor muscles.
    • Exhale and gently draw in your pelvic floor muscles, allowing your lower abdominal muscles to also gently draw in. Aim for a “moderate” effort to allow activation of the muscles but not overactivate them.
    • Then, relax your muscles again as you inhale, repeating this cycle.
    • Aim to do this for a minute or two, twice each day.

Stay tuned as we continue this journey over the next few weeks and months! What have been your challenges after childbirth? For my fellow health care professionals, what else do you like people to know immediately after a caesarean birth?

Have a great week!

Jessica

Sex After Baby- 4 Reasons Why It Can Hurt and What To Do About It

“Ok, TMI…but is everyone having sex again? We tried last night and OMG it was awful! So painful!!”

I clicked on the thread in one of my Facebook moms groups, and slowly looked through the comments, hoping to see words of encouragement, support, and most importantly, solid health advice. 

“I know, me too. I just try to avoid it as much as I can.”

“What is sex? LOL”

Then, I began my comment, “Hi, I’m a pelvic PT and also the mom to a 6 month old. I’m so sorry you’re hurting. It’s so important to know that pain is not something you have to live with. There is help out there…”

Why is painful sex after childbirth so overlooked in healthcare? Why do so many women feel like they just have to live with this as a normal “consequence” of having a baby?

This past fall, I went through the craziest initiation process to join one of the most exclusive clubs out there: Motherhood. It has been an incredible and humbling journey for me, especially as a health care provider who specializes in helping women with problems they experience while pregnant and postpartum. Becoming a mother has allowed me to experience and witness first-hand many of the challenges women face after having babies.

Pain during sexual activity is extremely common after childbirth (Note: I said common…NOT normal). In fact, a large study of over 1000 women found that 85% experience pain during their first vaginal intercourse postnatally. At 3 months postpartum, 45% still were experiencing pain and at 18 months postpartum, 23% were still experiencing pain. Let that sink in. When a mother’s baby is 18 months old, 1 in 5 mamas had pain during sex! And the sad thing is that pain during sexual intercourse is SO treatable!! So, let’s get down to business…

Why could sex hurt after a baby? 

baby-165067_1280

  1. Perineal Trauma from Childbirth

    Spontaneous tearing and episiotomies are very common during vaginal deliveries. In fact, this study looking at 449 women who had at least 1 delivery found that only 3% of them did not have any tearing/episiotomy. Many women are able to heal from tears without problems. However, for some women, these injuries can become sources of pain, especially during sexual intercourse. This is especially true with more severe tears extending into the external anal sphinctor and rectum (grade 3-4 tears). This study found that women who had tears extending into the anal sphinctor were 3-4 times more likely to have pain during intercourse at 1 year postpartum compared to their counterparts. Perineal scars can be very sensitive and move poorly in some women leading to persistent discomfort which can last for years after the baby is born when it is not treated (but guess what? It CAN be treated!)

  2. Hormonal Changes

    Anyone who has had a baby can attest to the crazy hormonal fluctuations that happen during pregnancy and postpartum. One of my very best friends warned me about this telling me that she cried every day for the first week after the baby was born. Guess what? So did I. These crazy hormones can also impact what is happening down below, especially in breastfeeding mamas. Basically, the hormonal changes lead to decreased estrogen in the vulvar tissues often causing thinning and dryness. This is why breastfeeding is associated with painful sexual intercourse early on postpartum. Now, if you are reading this and you are a nursing mama like myself, should you stop to fix your sexual discomfort? Not necessarily. This study found that although nursing was associated with dyspareunia at 6 weeks postpartum, the association was eliminated by 6 months. Meaning, stopping nursing won’t necessarily fix the problem (so don’t let this be your deciding factor in the decision to breastfeed your babe).

  3.  Tender Pelvic Floor Muscles

    The pelvic floor muscles themselves can become big sources of sexual discomfort if they are tender, shortened or irritated after childbirth. Perineal trauma and hormonal changes can lead to tenderness in the pelvic floor muscles, but the muscles can also stand on their own. Many people believe that C-sections protect the pelvic floor muscles from having problems, however, we have to remember that the pelvic floor are one member of a team of muscles (including the deep abdominal muscles, low back muscles and respiratory diaphragm) that work together to provide support and stability to the pelvis. That could be partially why C-section mamas are actually 2-3 times more likely to experience more intense pain during sexual intercourse at 6 months postpartum.

  4. Because Babies are Hard

    I had to add this one in. It’s important to remember than normal sexual function should include sexual desire, arousal, and orgasm. New mamas are exhausted, feeding sweet little babies around the clock, settling into a new routine whether they are returning to jobs or caring for their babies at home,  sleep-deprived from often waking up multiple times a night, changing diapers, and worrying constantly about helping these little babies survive and thrive. And honestly, it can be really hard for many moms to have the same level of sexual desire and arousal that they had prior to having their babies (at least until life settles down– or I’m told–when the babies go to college LOL). When a woman experiences sexual desire and arousal, there is natural lubrication and lengthening of the vaginal canal, and this step is so important in having enjoyable sexual activity. Sometimes, when this step is skipped, women are more likely to experience discomfort with vaginal penetration.

So, what can be done to help?

Realize it is not normal. Don’t just deal with it. And check-in with your Obstetric provider.

The first step is seeing your OB or midwife to make sure everything is ok medically. She should evaluate you to make sure everything is healing the way that it should be healing and that nothing else is going on that needs to be managed medically. I have had patients who have had difficulties healing after tears and needed some medical help to encourage their tissues to heal the way they needed to. I have also worked with women who had underlying infections contributing to their pain, that of course, needed to be treated to move forward. This is not a step you should skip, so don’t be bashful! Tell your doctor what is going on.

Don’t be afraid to use a little help.

I get it. You never had to use lubricant before, and it’s annoying to have to use it now. But guess what? It can make a HUGE difference in reducing discomfort from thin or dehydrated vulvar tissues after babies! So, if you don’t already have a good one, go pick out a nice water-based lubricant to use. Some of my favorites for my patients are Slippery Stuff and Sliquid. I am also a big fan of coconut oil (but make sure to know that using it with condoms can cause condom breakdown).

If you are having difficulty with sexual arousal and desire since having your baby, and you feel comfortable with it (I know, some women don’t!), try using a small vibrator to help with improving sexual arousal and promoting orgasm. Many sex therapists I work with encourage couples to consider using this on days when they need a little assistance attaining the arousal they need.

Educate your sexual partner and empower them to help you

It can be so helpful to include partners in this process. Show them this blog post, so they can understand what could be going on, and empower them to help you! For some women having difficulties with arousal, having their partner do something like clean up after dinner and put the baby to bed so they can have time for a quiet relaxing shower can be just the ticket to helping them become more sexually aroused to decrease sexual discomfort. If you are having problems with painful perineal scars or pelvic floor muscles, consider including your partner in your medical or physical therapy visits so they can understand what you are experiencing. Many pelvic PTs (like myself) will often educate partners in methods to help with decreasing pain , and even in treating the pelvic floor muscles/scars (if both people feel comfortable and on-board with this!).

Go see a pelvic PT!

If you have tender pelvic floor muscles or painful scars, all the lubricant and sexual arousal in the world is not going to fix the problem. Working with a skilled pelvic floor physical therapist can be hugely beneficial in identifying where and what the problem is, and helping you move forward from pain!

A skilled physical therapist will spend time talking with you the first visit to understand your history (including specifics of your delivery), and will perform a comprehensive examination, head to toe, to see how your body moves, where you might not be moving as well as you could be, and how you transfer force through your body. They will also perform an examination of the abdominal wall (especially important for C-section mamas), and an internal vaginal examination of the pelvic floor muscles. Based on this examination, they will be able to work with you to develop a plan to help you optimize the function of your body and get back to a happy and healthy sex life!

This is first in likely a few series of posts I will be doing on postpartum specific problems. I hope you all enjoy! Please please please reach out if you have any questions at all!

Have a wonderful week!

Jessica


Painful scars? Yes, you can do something about it!


lion-1015153_1280

I can’t help it. Every time I think scar, I think… Scar (and yes, I used to have a much better picture of Scar from The Lion King for you…but I had to remove it in my attempt to make sure I’m not violating anyone’s copyright laws!)  I was going to try to think of some funny way to explain why scars and Scar are the same… but I can’t… I relate it to the 50,000 times I have watched The Lion King... so I’ll leave it at that.

Scars can be a big pain though– literally! I have treated women who even after several years cannot tolerate pressure on a c-section scar. Men who have nice huge abdominal scars that ultimately contribute to problems with constipation. And moms who have discomfort near their perineal tears every time they have sexual intercourse.  The truth is that scar tissue is often something skilled physical therapists will evaluate and treat as part of a comprehensive program in men and women with pelvic floor dysfunction(and really, with any type of problem!). And the best part– treating scar tissue can make HUGE differences!

So, what is a scar? 

When there is an initial injury (and yes, a surgical incision is an “injury”), the body goes through three phases of healing: Inflamation, Proliferation and Remodeling. Through this process, the body creates scarring to close up the initial injury. Scars are composed of a fibrous protein (collagen) which is the same type of tissue that is in the tissue the body is repairing (i.e. skin, etc).  The difference, however, is that scars are not quite organized the same way as the tissues they replace, and they don’t really do the job quite as well. (i.e. scars are much more permeable to UV rays than skin is). Scars can form in all tissues of the body– even the heart forms scar tissue after someone has a heart attack (myocardial infarction).

How do scars lead to problems? 

After the inflammation and proliferation stage of healing, comes the remodeling. This stage can take months to years! During this time, the body is slowly adapting and changing the scar to the stresses on the tissue. Have you ever noticed that some scars initially are pink and raised and then over time become light/white and flat? That’s remodeling.  Ultimately, there are a few major reasons why a person might develop pain from a scar:

  • Adhesions: Scars are not super selective when it comes to tissues they adhere to. So, sometimes, scars will adhere to lots of tissues around them and this pull can lead to discomfort.
  • Sensitivity: Scars can become very sensitive for a variety of reasons. Sometimes, small nerves can be pulled on by the scar which can lead to irritation. Other times, people themselves will have a significant amount of fear related to the scar. This fear, can often make people avoid touching the scar, and that, along with what we know about how our brain processes fear and pain (See this post, this one, and this one), can lead to a brain that is veeerrrryyy sensitive to the scar. Along with this, muscles near scars can become tender and sensitive. This can occur due to the scar pulling on the muscle or due to the sensitive nerves in the area.
  • Weakness/Poor Muscle firing: So, we know that when our tissues are cut, the muscles around the tissues are inhibited (have you ever seen someone after a knee replacement? It can be quite a bit of work to get those muscles to fire immediately after surgery). That’s why it’s important to get the right muscles firing and moving once a person is safely healed. Moving the right muscles improves blood flow too which promotes healing.
  • Changing Movement: Painful scarring can lead to altered movement. We can especially see this with postural changes after c-sections or other abdominal surgeries, but movement patterns can change with scars all around the body. We also know that abnormal movement patterns over time can lead to dysfunction and pain.

op-103061_1920

What can we do about it? 

There are several ways physical therapists can help decrease pain from scars. Can we actually break-up/melt/eliminate scar tissue? I don’t really think so– honestly, scars are made from strong material and truly breaking up the scar is typically something that has to be done surgically– but most of the time, that is not necessary. We can decrease pain from scars by:

  • Improving the mobility of the scar: Gentle techniques to massage the scar and the tissues around the scar can facilitate blood flow to the area and decrease some of the pulling on the tissues around it. There is a thought as well that scar tissue massage can disrupt the fibrotic tissue and improve pliability of the scar (basically, help the scar organize itself a little better, and ultimately move better), and help to promote decreased adhesions of the scar to the tissues around it. Unfortunately, there really is not a lot of great research out there about scar tissue massage. However, this review published in 2012 found that 90% of people with post-surgical scars who were treated by scar massage saw an improvement in either the appearance of the scar or their overall function–which is very promising!
  • Desensitizing the scar and the nervous system: This is where I think we can make huge changes–both by improving someone’s worries/fears about the scar (calming the nervous system) and by slowly desensitizing the scar and the skin around the scar to touch. This is a slow process, but over time, many people who initially can barely tolerate pressure on the scar can be able to easily touch and move the scar without discomfort.
  • Promoting movement: So, we talked about how muscles can become inhibited or tender after a surgery? Part of improving scar tissue related pain is helping the muscles around the scar move well and learn to fire again. This can include some soft tissue treatment to the muscles to reduce the tenderness of the muscles, but ultimately leads to learning to use the muscles again in a variety of movement patterns. Movement is amazing for the body and can not only improve blood flow, but decrease pain too!

Wanna learn more? 

Several of my colleagues have written wonderful information about scar tissue! Check out this great, article and free handout by Kathe Wallace, PT on abdominal scar massage! My colleagues at the Pelvic Health and Rehabilitation Center have also written a few blogs on scars, which you can find here and here.

Have a great rest of your week!

~ Jessica